VR Mesh Cutting Tool
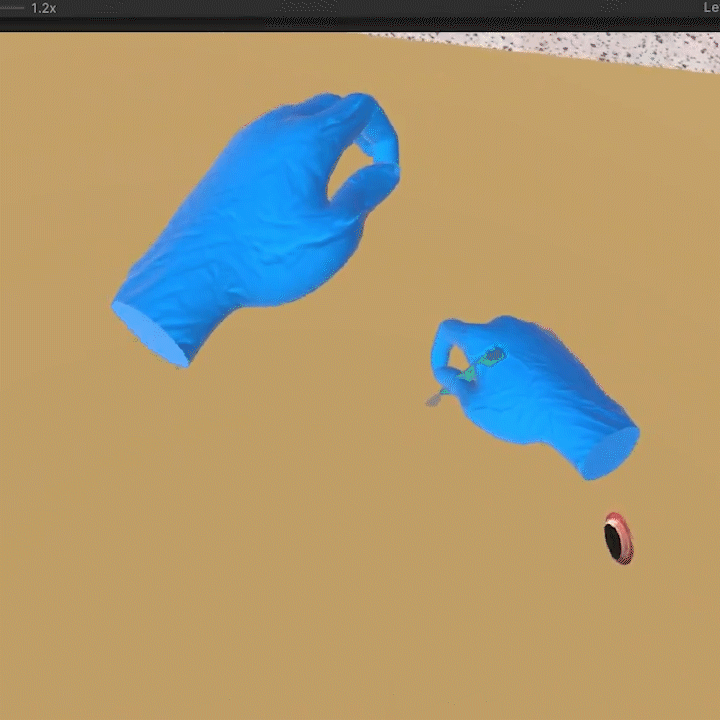
Brief Video Overview of the project
The Problem
This Tool was made during my research internship at Penn Medicine while working on VR Surgical Training Didactics that would be used wirelessly on the Oculus Quest 2 developed on the Unity Engine. This was specifically made for a module that would train surgeons on completing a "Surgical Airway" procedure, in which surgeons would make a small incision into the patient's neck.
This would use the Quest's hand tracking feature to increase the immersion and practice value of the simulation. However, to make this simulation accurate, we needed to use a real-time mesh cutting feature that would run at least 75 FPS on the Quest to deter motion sickness.
However, there was no accessible algorithm that would be able to modify and cut complex meshes in realtime while maintaining the high framerate needed for VR.
Breakthrough Ideas
To solve this complex issue, I began searching through the internet for effects that would help me figure out this effect. I started by specifically looking through effects that created a hole or cut in a surface that wouldn't have to rely on changing too much of the underlying geometry.
Luckily, I stumbed on this video by Gabriel Aguiar that showed how to generate cracks on the ground using a 'crack mesh' that would be rendered on the surface on the ground and used a stencil buffer and passthrough rendering in order to create the effect that this crack was 'cutting into' the ground.
I decided to extrapolate this idea to my own problem by creating my passthrough rendering materials that would be able to create the illusion of cutting through the mesh. However, because this cut had to be generated by the user, it could not be static and had to be procedurally generated using the user's hand tracking.
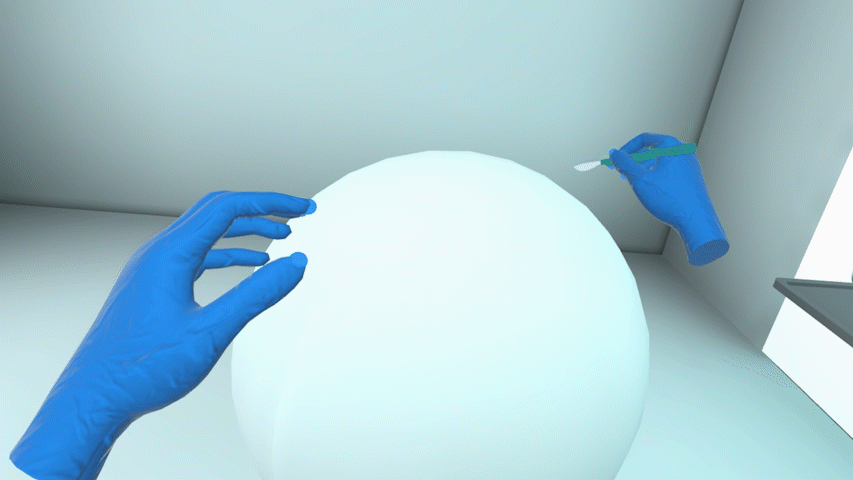
Early Prototype of the tool that instantiates cut meshes
Implementation
To apply this concept to my own purpose, I defined certain objects as cuttable and used the point of the scalpel object as a marker to test when a cuttable mesh was intersected. The intersection location in the mesh's local space was determined by the mesh's own physics collider, allowing intersections to be checked from a simple box or cylinder for more performant calculations to a complete mesh collider which would record more accurate intersections.
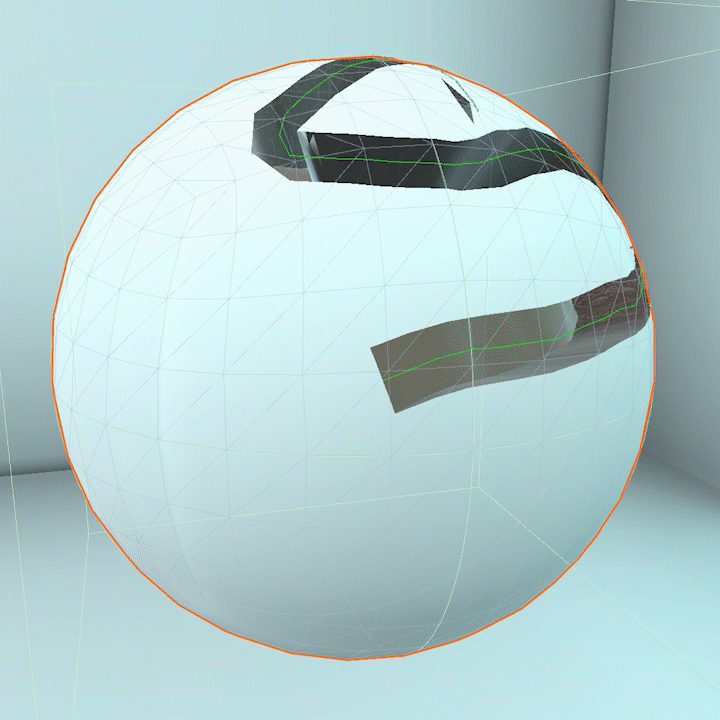
However, having these cuts occur with every check of the intersection would have been too inefficient so I needed to come up with a way to only create a single valid intersection point in each section of space. To do this, I implemented a simple 3D Hashing algorithm that would break up each point into a single section of space so that each section would only have one intersection point.

Whiteboard prototype of the 3D Hashing Algorithm
Since I needed the cut to be continous as the user intersected the scalpel with the mesh, I decided to use a spline structure in order to have points of a bezier curve be placed in each hashed section of space as the user intersects the scalpel with the mesh. I used this library from Sebastian Lague to implement the splines into the project.
View of the spline and underlying procedural geometry of the cut.
Now that we have a spline in 3D space which represents the cut we want to create, we need to actually generate the mesh along the spline. Luckily, the library comes with powerful tools to achieve this, which I used to procedurally generate a mesh along the curve. However, in order to get a convincing look, I had to generate the mesh right on the surface of the model while using the surface normal to align the mesh generation right under the surface of the cuttable mesh in the correct orientation. Using a Ray Caster from the scalpel, I found the surface normal of the cuttable surface and used that orientation as the local up vector to generate the cut mesh right along the surface of the mesh that is being cut. With some more simple calculations, such as finding the local right direction by crossing the up vector and direction of the spline (the forward vector since Unity is left-handed), the mesh was able to be generated convincingly along the spline.
Finally, to make this mesh actually look like a cut, I allowed material parameters into the mesh creation script so that the user would be able to apply custom materials to the top layer of the cut, sides, and bottom. By applying the passthrough material from earlier, since the mesh was generated with the normals of the top layer pointing up, the top layer is not visible and it creates the illusion that the object is being cut into.
Combining the passthrough material, section hashing, splines, and mesh generation, I was able to create the intended effect. Under the hood, as the user intersects the scalpel (or whatever is set as the cutter object) with a cuttable object, a point on a spline is generated (or a new spline is created if it is part of a new cut) as long as the user is cutting within a new section of space determined by the hashing algorithm. Then as new points are being placed on the spline, the mesh is generated taking in the scalpel's distance from the surface, also simulating cut depth. And best of all, this whole system is incredibly performant in realtime VR. Nice!
Usage
This tool can be used by both users of the program as well as developers. The mesh generation script can be run before runtime along a spline, which is also easily editable within the editor due to Sebastian Lague's fantastic spline library. The developer also has access to several parameters within the script, allowing them to change cut width, the materials on the sides and bottom of cut, and how accurate the cut can be by customizing the section block size of the hashing algorithm in any of the x,y,z axes. All in all, this tool is intuitive to use for the developer and has a seamless experience for the user if they want to cut up an object, particularly in a surgical simulation.
Material Customization for the cut
Future Work and What I've Learned
This project was an incredible learning experience for me and I fully appreicate the oppoturnity to work on an exciting project like this where there wasn't a clear cut solution and a new system had to be figured out. Although I no longer work on this project, and I'm sure it has been continued to be developed, some new features that could be added are looping cuts, dynamic cut width based on scalpel orientation, general bug-fixes and specifically for a surgical use case, blood effects when a mesh is cut.
Through this project, I learned how to leverage my resources to compile different ideas and solutions to figure out ideas that would work for my specific problem. Having that 'aha' moment when watching the ground crack VFX tutorial and realizing I could exrapolate a similar process for creating an efficient cutting system was amazing and I hope to have similar moments when figuring out a graphics problem for future technical art projects. This was also my first experience working through these projects in a group setting and talking through problems as a team. Although this project's implementation was mostly designed and programmed by me, having teammates to bounce ideas off of was an invaluable resource and something I hope to have more in the future.
Special thanks to my entire team at Penn Medicine for being there for me and my ideas, especially by mentor Dan Weber, and my fellow PURM DMD'er, Jacqueline Li.
Final Demo of the Cut.