Procedural Wall Material
Brief Video Overview of the project
Introduction & Goals
This project is my first full interactive procedural material within Substance Designer. It was made for the larger group project, procedural city. For this project, we needed a brick wall material for the walls and chimneys of the procedural medieval city that we were putting together.
We had the following goals:
- A Realistic Style
- Customizable Brick/Stucco Ratio
- Controllable Brick Patterns/Tiling
- Integration with Unreal Engine
In order to make this material in Substance Designer, I had to focus on two different parts and find a way to blend them together; the bricks and the wall.
References
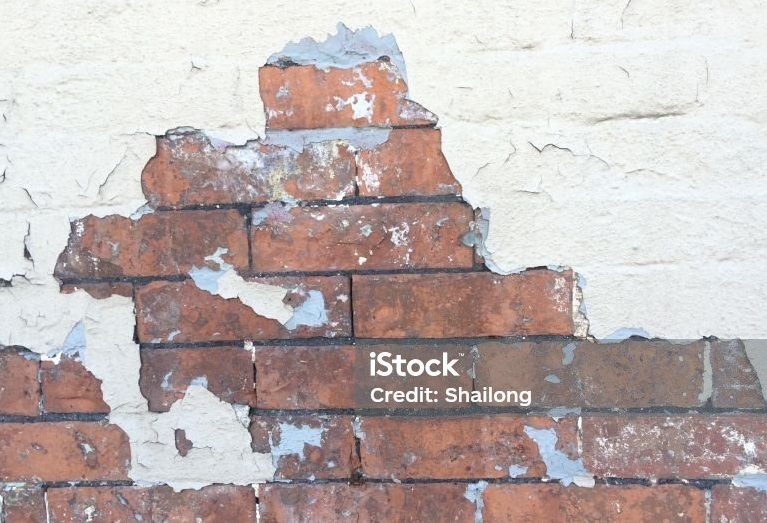
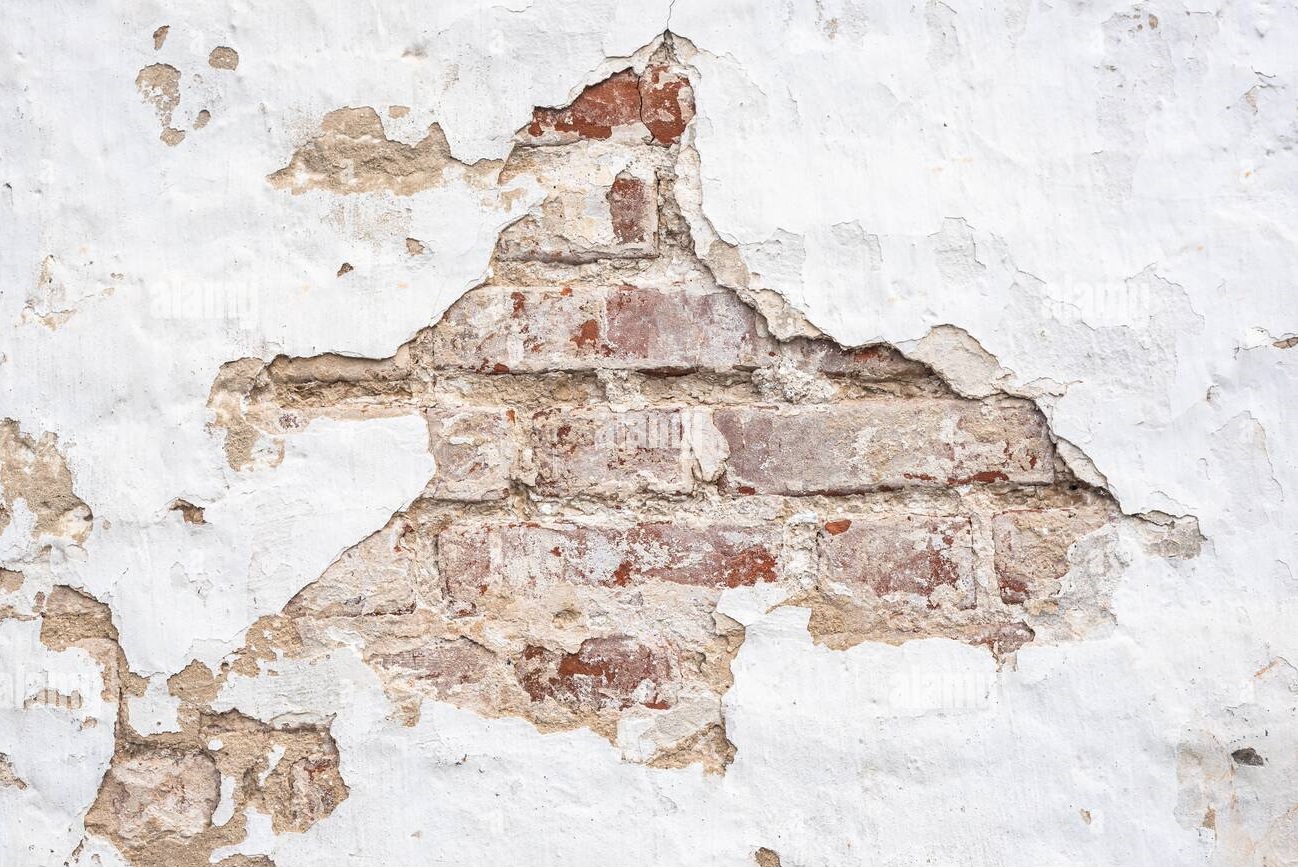
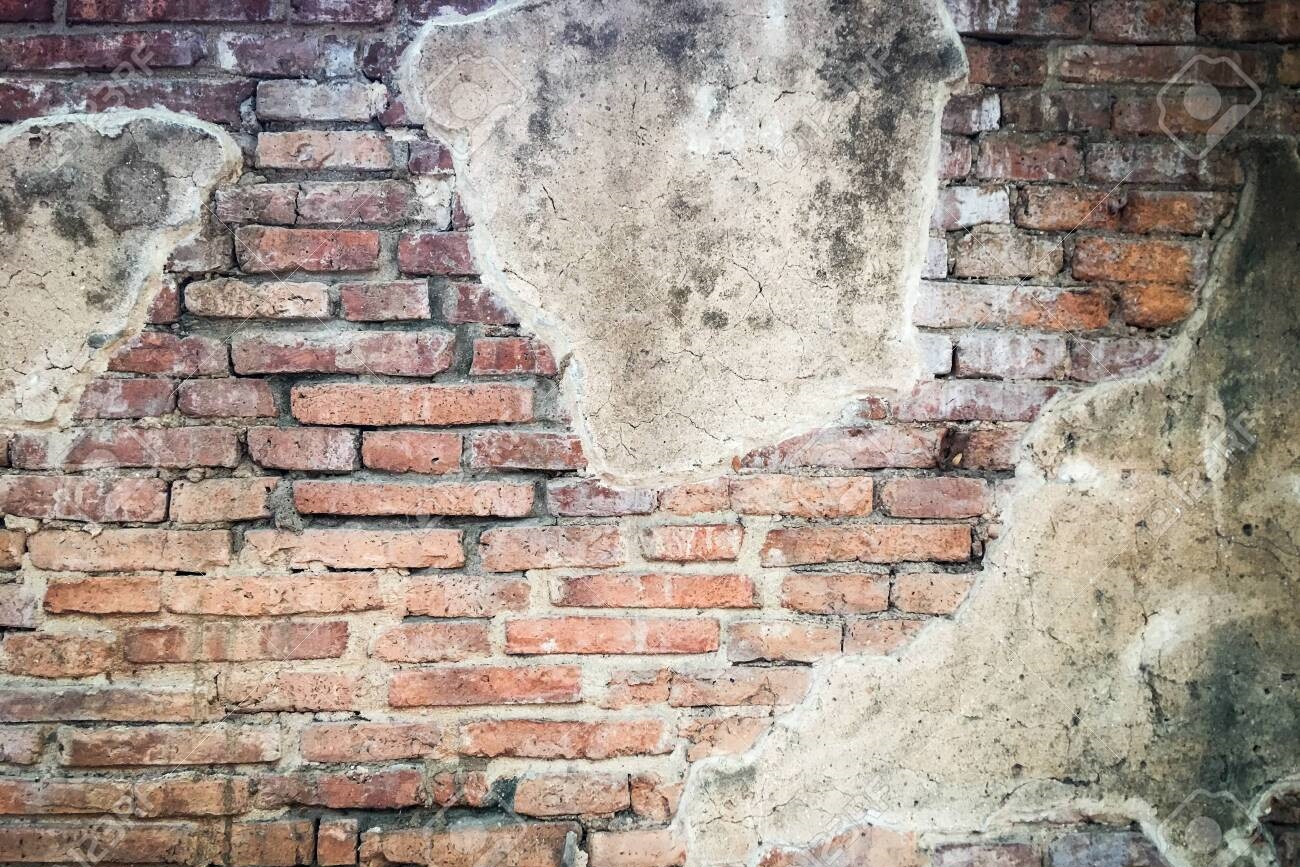
Like with any project that creates a visual output based on realism, some reference photographs are needed. Through these references I noticed this wall had brick exposed in certain blobby spots through the stucco, which could be simulated by something like Perlin Noise. I also noticed that each brick had some bit of warping and edges either occluded or chipped off by the stucco. I kept these observations in mind and applied them to my workflow.
Making the Bricks: The Shape
First, I started with the core of the material: the bricks.
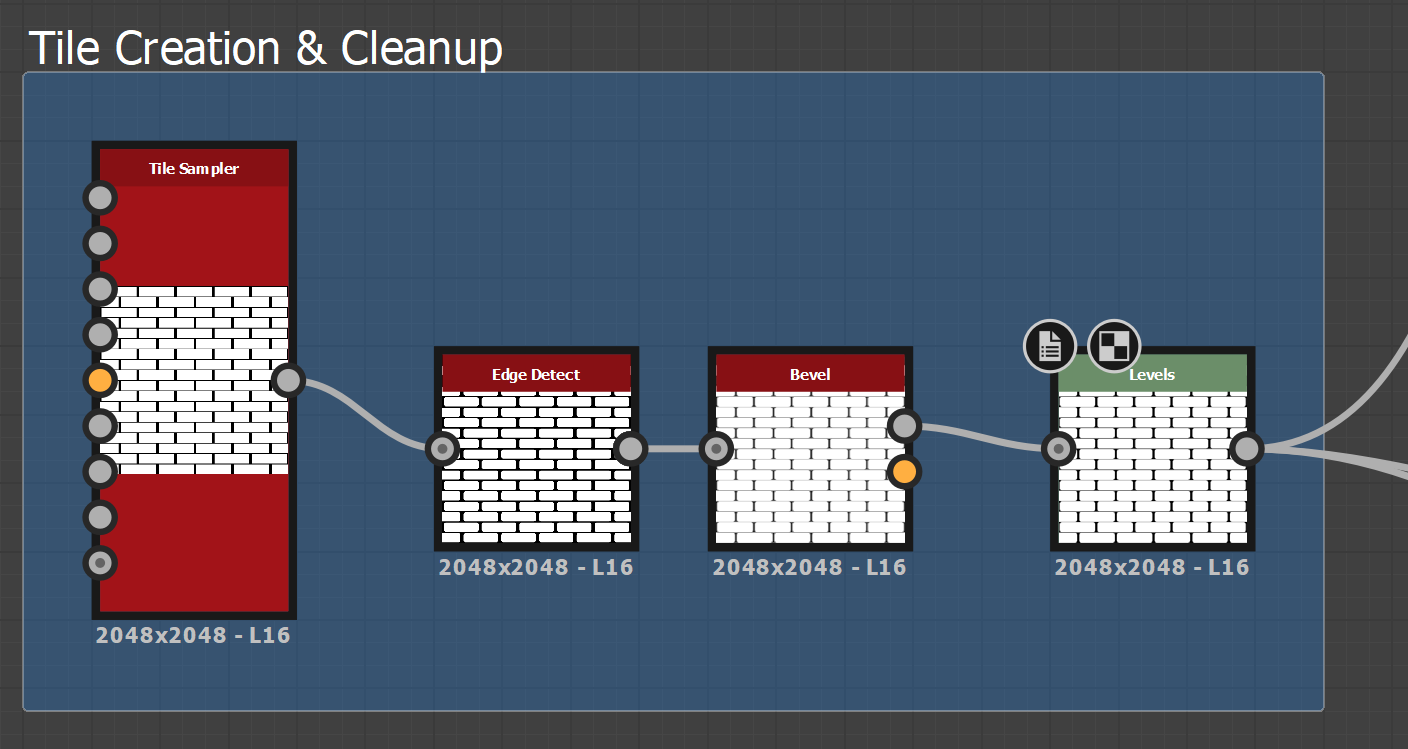
Luckily, Substance Designer has a Tile Generation Node that I leveraged alongside edge detect, bevel, and levels nodes to get that rounded brick look.
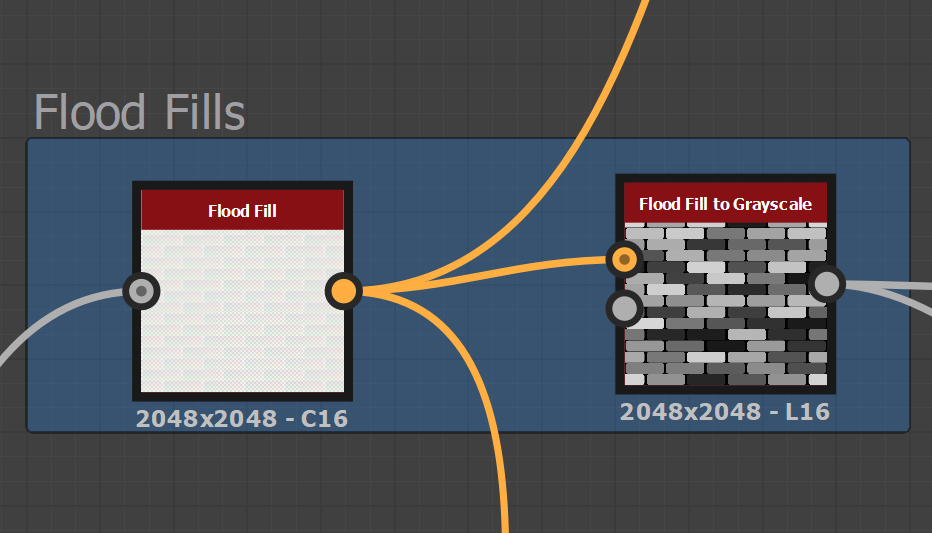
To fully customize how each brick looks, a core node used in my workflow was the Flood Fill node. Because it finds 'islands' in the image and allows seperate effects to be done to each one, it was perfect for me to independently apply effects to each bricks. This is done by using more flood fill nodes like grayscale, which applies a different lightness to each brick, and gradient, which applies a randomly oriented gradient to each brick.
Next, I wanted to give each brick realistic and non-uniform shape. To do this, I wanted to chip off a piece of each brick so they weren't all the same shape and gave it the weathered look.

To do this, I first used Flood Fill Gradient with Clouds to get random edges of the brick to chip off.
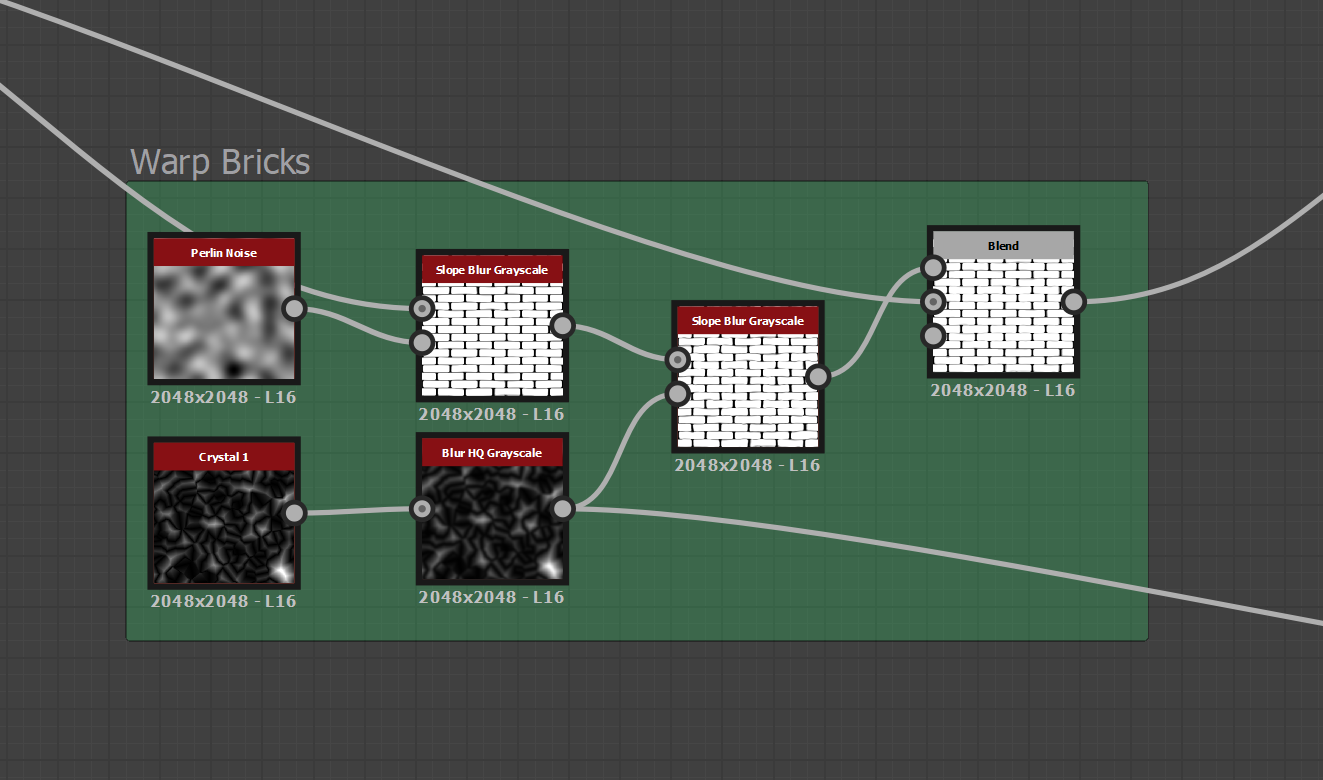
Then, I used a combination of Perlin and Voronoi Crystal Noise to warp the edges of each brick and make it look old.
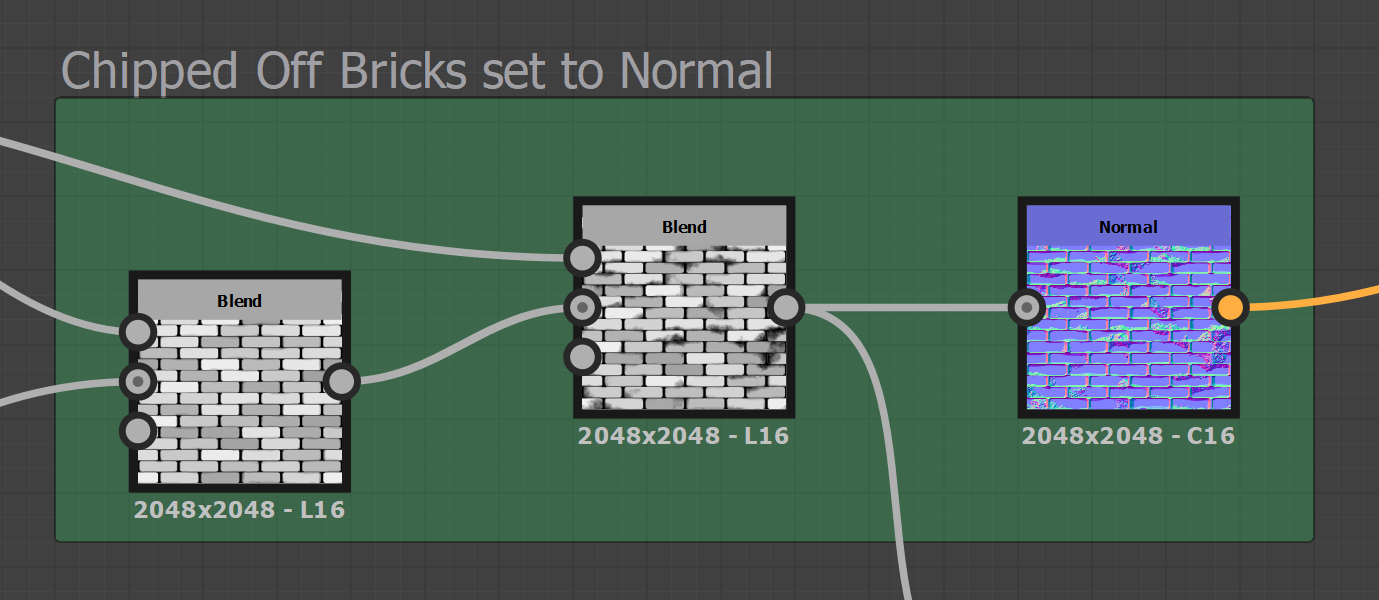
After using a Flood Fill Grayscale to give each brick a slightly different shade, I blended the warped bricks and the chipped off edges to get the realistic shape I wanted. In order to give them their much needed depth, I used the normal node with a high intensity to exaggerate the shape of each brick. Running that into a Curvature Smooth Node allowed me to convert those normal values back into grayscale to finally get a realistically shaped brick texture.
Making the Bricks: The Color
First, I wanted to create the overall color of the bricks. Using the brick shaped texture we just made, along with Flood Fill Greyscale and BnW Spots for added variation, I mapped the values to a gradient map with different values of brown to create the brick colors.
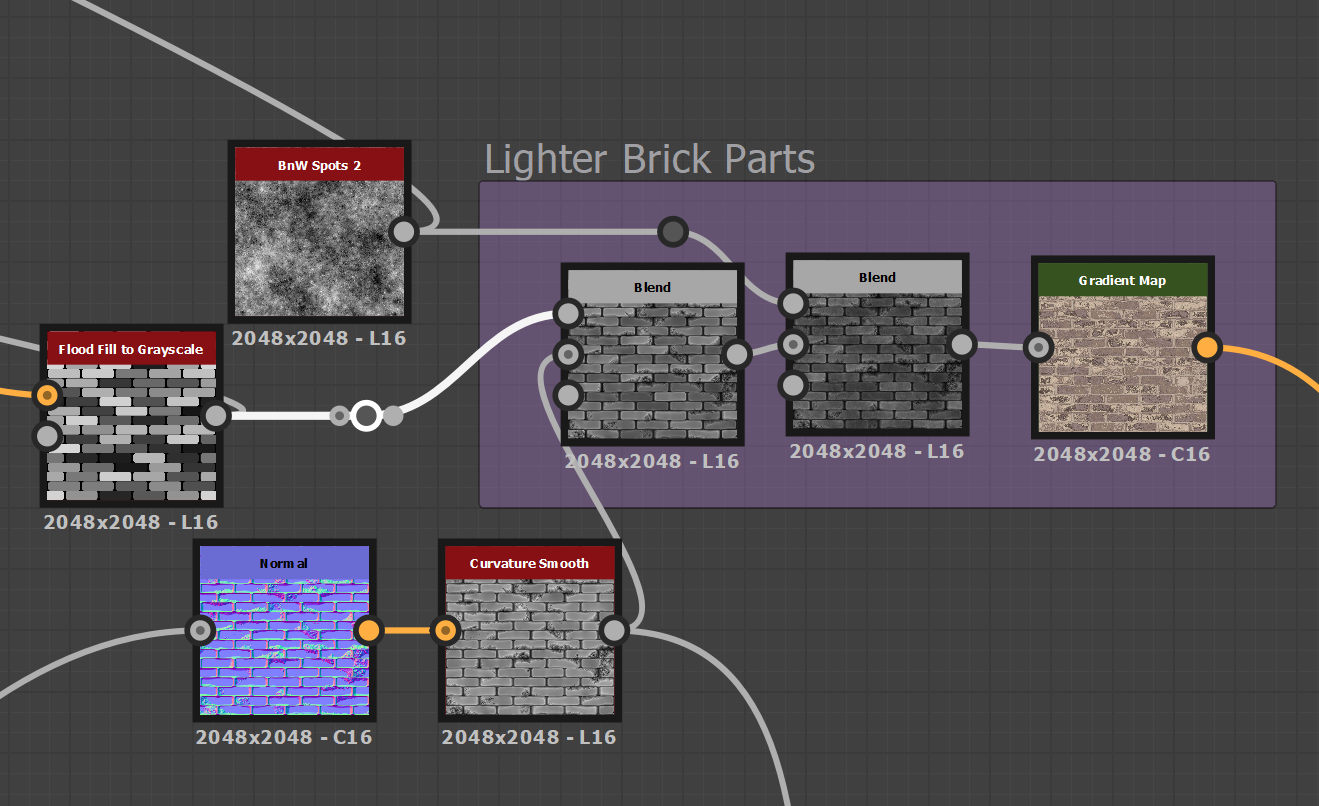
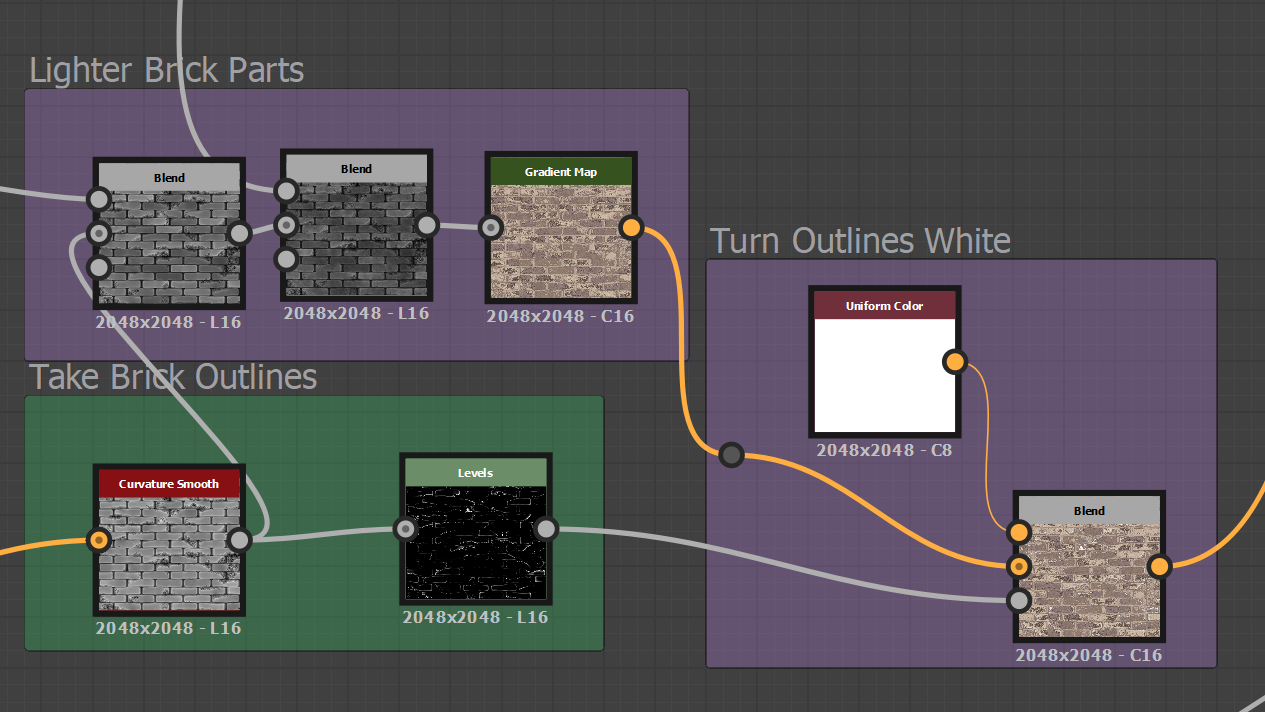
However, these bricks were still lacking the white outlines on the edge of each brick to show the cement of each brick poking through the paint. outlines.
I used a levels node to highlight the edges of the brick texture and used it as a mask to mix the color white with the established brick color to create these outlines.
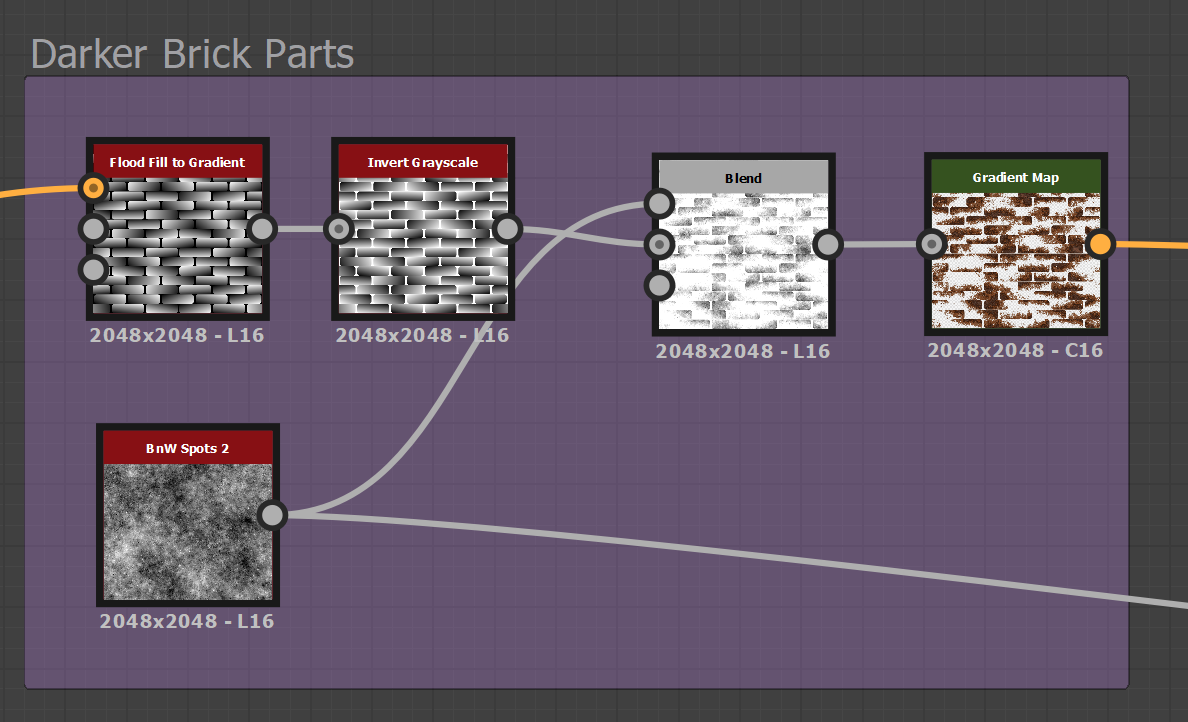
But these bricks still look too light and flat. I wanted to create a darker part of the bricks to push the contrast.
I used the Flood Fill Gradient with BnW Spots to give the bricks a rusted, spotty look on just some sections of each brick. After applying a gradient map with the colors I wanted, the darker parts were done.
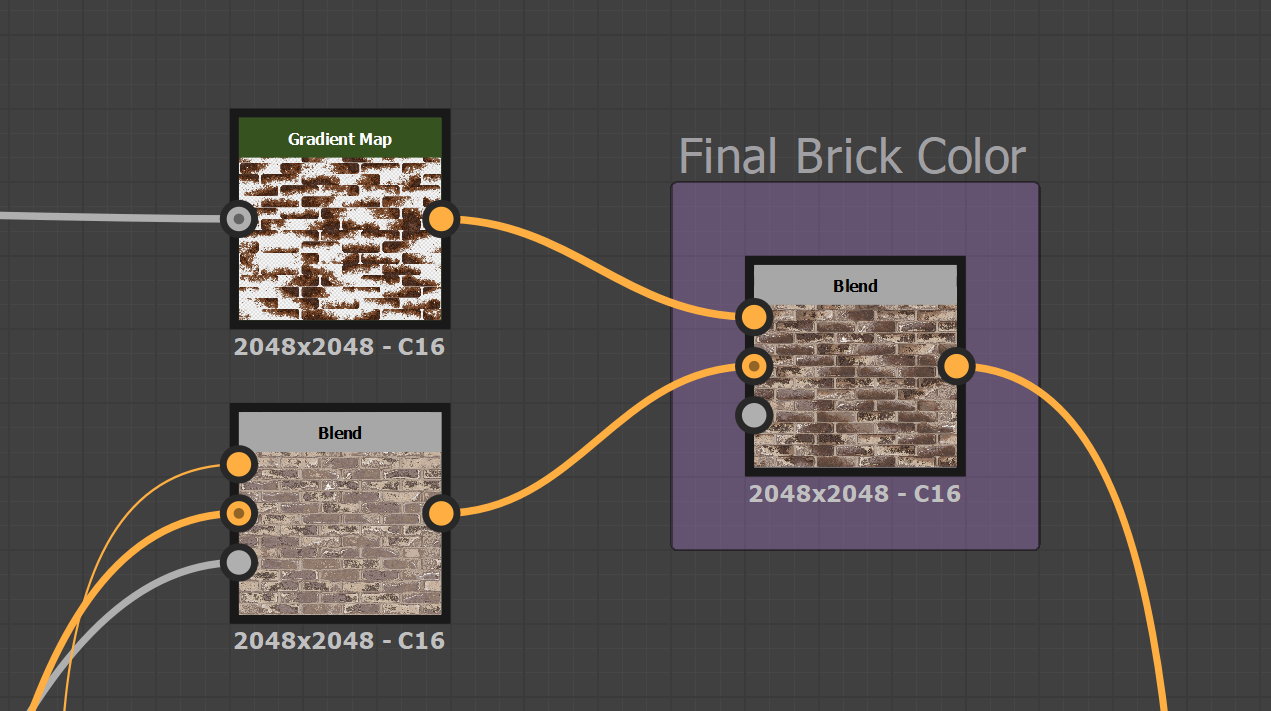
Finally, I blended these darker and lighter values together to create the final brick color.
Making the Stucco Wall
Making the base wall was luckily simple. Since the wall exists to be somewhat plain to give more attention to the bricks, it doesn't have to be super complicated.
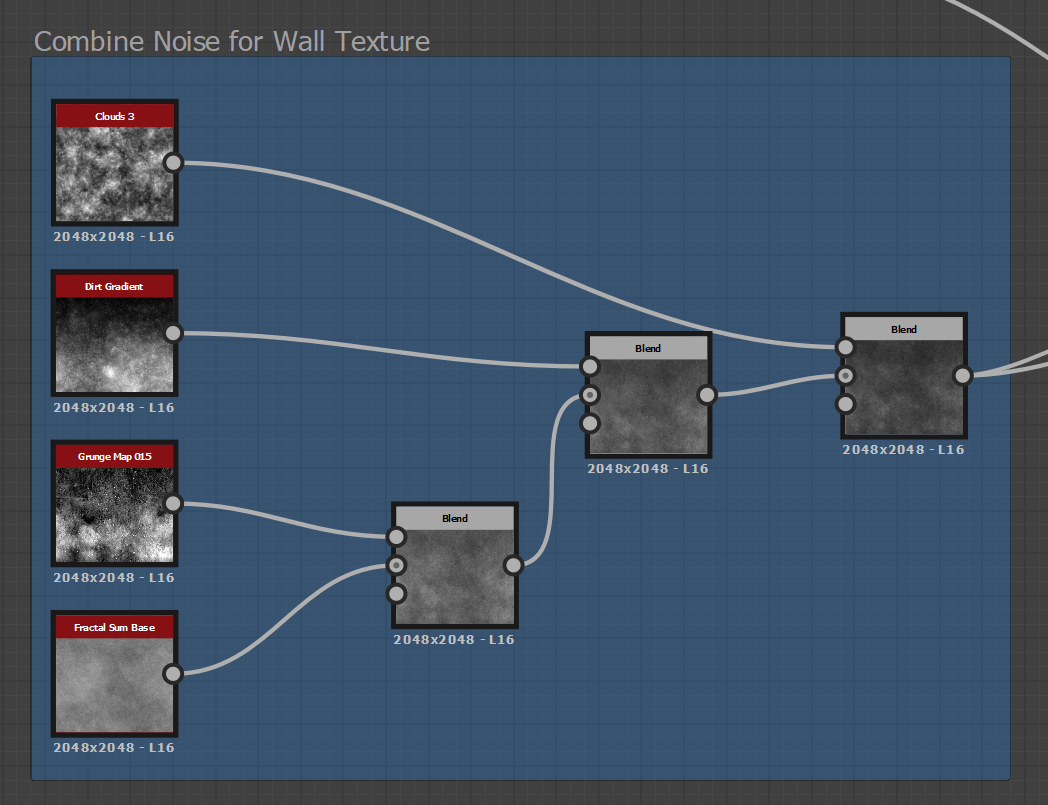
To make the wall texture, randomness is best. I just used a combination of several noise functions inputted into a gradient map to make the final wall with colors.
Making the wall itself isn't enough, however. We also need to create a mask through which the bricks would be exposed through the wall.
To do this, I used a Perlin Noise with Clouds, Levels, and Directional Warp to create a mask in which the lower values would indicate where bricks could be exposed.
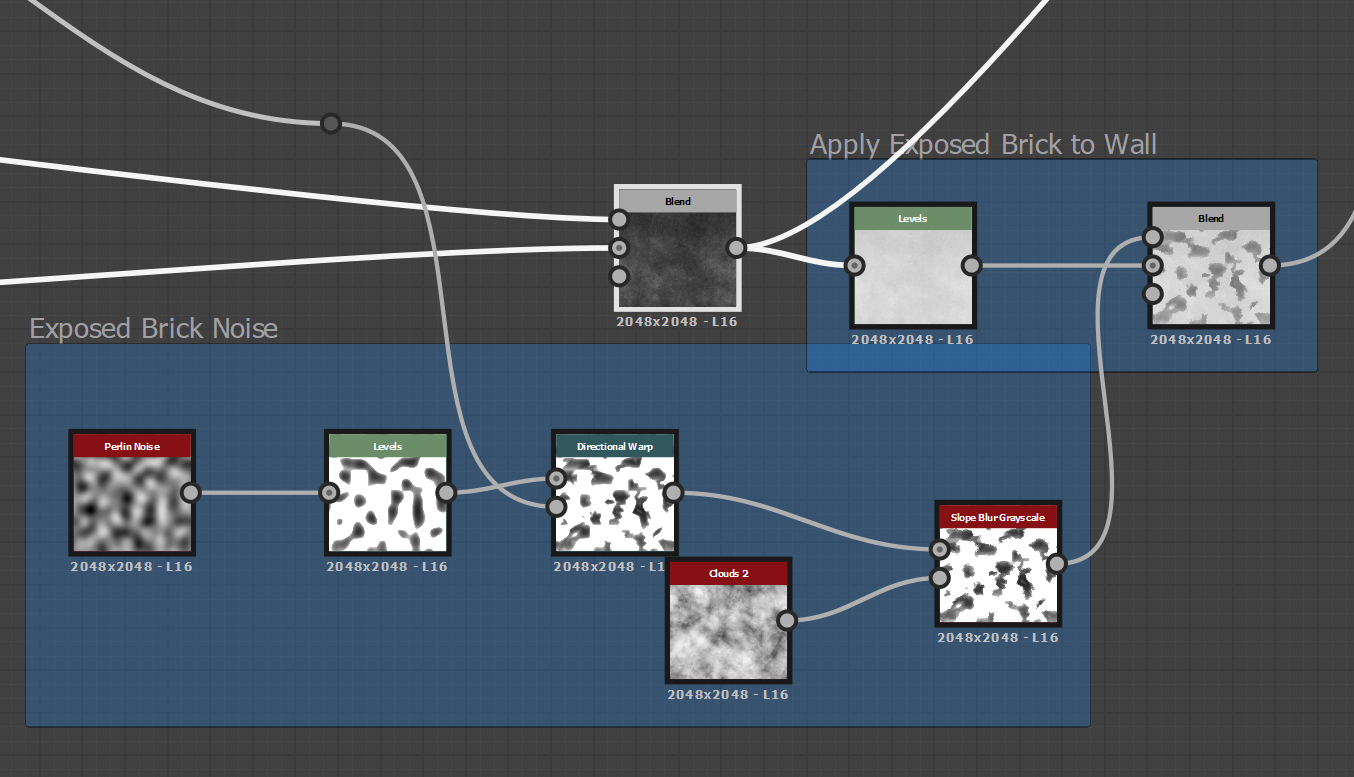
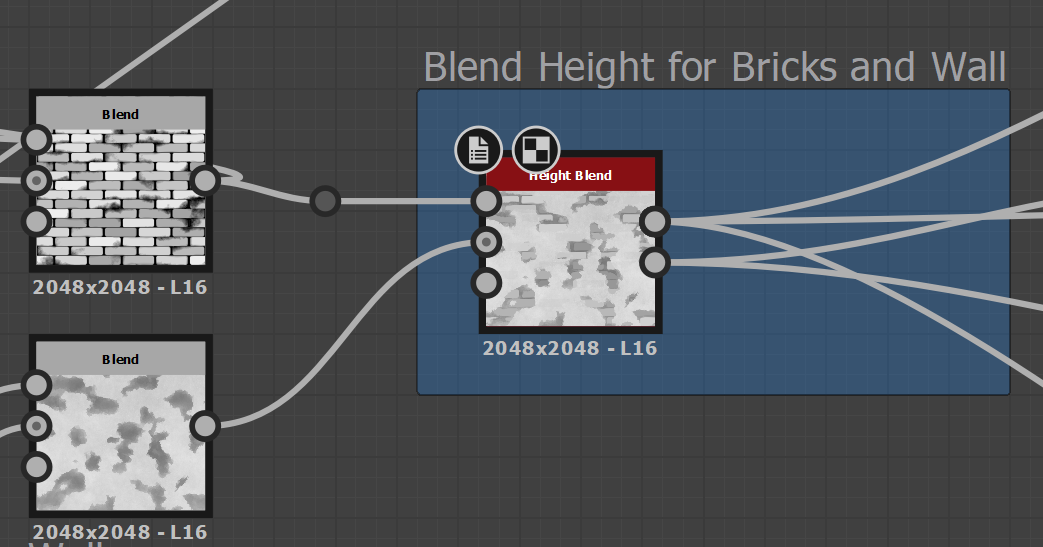
After blending that with the wall and the plain brick texture, we have the overall texture of the wall. Now, for the node that drives the core effect of this material: Height Blend.
Height Blend takes in maps for Height Top and Height Bottom and realistically blends these materials together to create a height map. By putting in the flat brick texture as the top and the wall as the bottom, I was able to create a height map in which the bricks poked through the exposed zones from the previously created map.
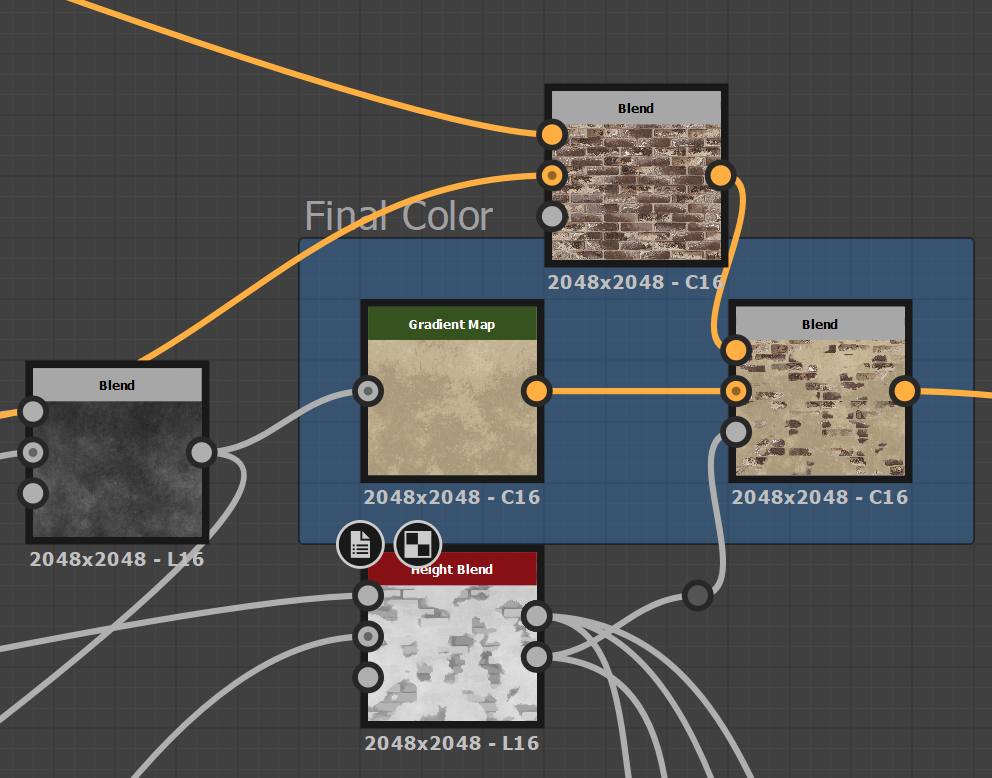
Finally, this core height map drives the creation for all of the indivdual maps used for our material.
The base color was taken by blending the bricks as foreground and the wall as background and taking the height blend as the opacity mask.
The roughness map was taken by blending a grunge map with the height blend and adjusting the levels to vary the roughness and create smaller highlights on the bricks.

Lastly, the Normals, Ambient Occlusion, and of course, the height, were derived directly from the height blend node. The normals were generated from a normal node that created them based on the height blend and the AO map was created through an AO node that took the data from the height blend to create the ambient shadows on the edge of bricks.
Customizing the Parameters
Now that we have our base material, I had to choose customizable parameters that would give the user control over the variation of the material. Since the variations weren't mean't to look wildly different, I wanted to focus control on two different aspects: changing the patterns the bricks were exposed, and changing how much the bricks were able to uniformly be exposed.
Since the brick exposure pattern was driven by the perlin noise, I used the Scale and Disorder inputs to the noise to change the tiling and pattern of the noise respectively.
The Scale input would change the size of the noise pattern and therefore the size of the exposed bricks.
The Disorder input would change the randomness of the pattern and therefore the randomness of the exposed bricks.
The ratio of brick to stucco was directly being controlled by the height blend node, so I used the inputs Height Offset and Contrast to control this aspect.
Height Offset would change how 'tall the wall was' and therefore how much of the brick would show through, either the top or the whole brick.
Contrast controlled the blending. A lower contrast value would reduce the 'opacity' of the wall and cause the bricks to show through even through the non-exposed area of the wall.
Unreal Engine Integration
Now that we've selected which inputs to expose, I had to integrate it into the overall project workflow for the Unreal Engine Script/Environment Artist that would put together the scene. Through the Substance Designer Plugin and importing the .sbsar export from Designer, the material was easily editable within Unreal Engine.
What I've learned
Going through the process of creating an interactive material with a goal really let me understand not only the power of specific nodes, but also the method in which you can mentally seperate effects and use the blend node to put them together at the end of the pipeline.
The power of the Flood Fill, Height Blend, and Gradient Map nodes were really shown to me through this project. But I also learned that splitting the project into sections like the brick shape, brick color, wall texture, wall mask, and blending it all together were instrumental in making this material and organizing the thinking and process in creating such a complex material. Commenting and using the frame tool to put together nodes performing a similar function greatly increased readability and let me easily pick up my thinking when working this on this across several days.
Overall, I'm very happy with the way this came out, and look forward to using these skills in making more materials with Substance Painter one day. Special Thanks for this tutorial by Youtuber Kalyson for providing me with a base to work with and guiding the process when I went astray.